Showing posts with label new faucet. Show all posts

Sunday, August 28, 2011

Success!

Yesterday did prove to be an interesting day.  There were times when we thought the sink project was going to get the better of us, but we hung in there and finally had success!  Here is how the story unfolded.....
Here is where we started with the old sink and faucet. 
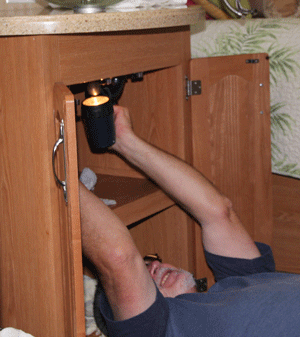
Here is poor Billy....flat on his back removing the screws that hold the counter top onto the base.  He has already shut off the water and disconnected the water lines and drain pipes.
Our first problem, was locating all the screws holding the counter top to the base.  We thought we had removed all the screws, but it would not budge.  Finally, after removing the interior panels, we discovered more screws on either side which had been hidden from our view.  After removing all the screws the counter top easily lifted off the base and now Bill could easily remove the sink bowl and faucet.
We have solid surface counter tops.  They are thinner than residential solid surface so they use a plywood "filler" to add stability.  That is the old drain pipe sticking out.
What a nasty mess that is.....we obviously had been having some leakage.
We have no idea why they felt it necessary to cut a square outta of the plywood....all that accomplished was making it next to impossible to use a wrench to tighten down the sink.   Which is probably why we were having leaks.
Bill's solution was to fill the square and then drill the appropriate size hole to pass the drain pipe through.  Now he could tighten things down properly!
Here we have the finished installation.......pretty nifty if we do say so ourselves.  One last improvement...we were able to actually center the counter top on the base.  The old install had left the counter top slightly off center in order to get the taller faucet to clear the door swing of the medicine cabinet.  Our new faucet has a much lower profile....so we could now place the counter top where it should have always been!  It was a job that took us most of the day, but the end result was well worth the effort.

Thursday, August 5, 2010

Roman Shades

In the beginning......my fifth wheel came with the same day/night accordion style shades  that you see in most rvs.  They didn’t last long.  Even though we took extreme care.....strings were breaking right and left.  I had my own window treatment business for over 10 years and I just felt these shades were the wrong choice for my rv.  I know some folks get along with them fine, but I can tell you they were never meant to be installed they way I saw them installed in my rv......and that is why string breakage occurs.  Most of my readers know I replaced all but the bedroom shades with a new style of  ‘roller shade’......which we love.  In the bedroom I decided to go with Roman shades which I can make myself.  The only drawback to a roman style shade is......it is either ‘open’ or ‘closed’.  There are no louvers to adjust as on traditional blinds and there is no way to do a ‘day/night’ option like the accordion style shades.  You certainly can control how much of the window is exposed when raising the shade, but that is it. 

Roman shades, as with most window treatments, need to be lined.  Since my shades are going into the bedroom, I choose to use black out lining.  I am usually an early riser, but I can’t tell you how many times we have been in an rv park and had a street light pouring into one of the bedroom windows.  Black out lining will put an end to that, as well as give us a little extra insulation value.  Speaking of insulation.....you can sandwich a layer of thin quilt batting between the fabric and the lining if you feel you need it.  Also I will be making a ‘flat’ style of roman shades.  There are also ‘balloon’ and ‘hobbled’ style roman shades.  A flat shade is just that....when it is fully extended the fabric lies flat against the windows.....no pleats and no puffiness.

Step 1:  Measure your window.  My window measures 13 inches wide by 23 inches long.  Now, I need to figure out my finished blind width and length.  I know I want my blind to extend past my window 2 inches on either side and I’m going to mount my blind at the ceiling and extend it 2 inches below the bottom of my window.  That gives me a finished blind measurement of 17 inches across by 28 inches long.  To figure yardage I need to add a bottom hem of 2 inches, side hems of 3 inches, and add about 2 inches at the top for mounting.  I’m looking at cutting a piece of fabric 23 inches wide by 32 inches long.  The lining (and optional quilt batting) can be cut to the finished blind measurement.....in my case that is 17 by 28.  Are you following me so far?  Please ask any questions in the comment section and I’ll post the answer in the next day’s blog. 

I have probably rambled on enough for today.  Tomorrow I’ll be in the construction phase of my blinds.  Look for my next post to appear on Sunday with detailed instructions and photos.  And.....little Belle is doing better....thanks for asking!

Here is a photo of our new faucet......ain't it pretty!!

And here is a photo of Bill....squeeezzzing under the sink.....ain't he pretty!!!  LOL!!!